Combining a cross-line laser with the seven centimeter saddle rule offers an effective way of measuring your position on a bike and comparing it across different bikes. This method is also valuable for documenting your current position on one bike to replicate it on another.
It’s important to note that you’re measuring your position relative to the bottom bracket center, you are not measuring the bike itself.
The method is simple and fast, with maybe the only drawback of requiring a cross-line laser for doing it (like a Bosch Level 2). I don´t own such a device and therefore borrowed one.
David Arthur shared a video where bike fitter Lee Prescott demonstrates this step-by-step: Suffering on Your Bike? These 10 Simple Bike Fit Tips Will Change Everything!.
Setup
- Position the bike: Secure the bike in a stand on level ground so that it is perfectly upright and horizontally balanced.
- Set the laser: Place the cross-line laser beside the bike, aligning it so that the laser intersects the center of the bottom bracket spindle. This setup projects a vertical line extending upwards from the bottom bracket and a horizontal line spanning left and right from the same point.

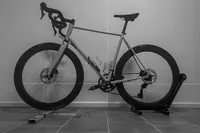
The leveled bike with a cross-line laser pointing towards the bottom bracket center. I´ve edited the picture into black and white to enhance the visibility of the laser lines.
Measuring
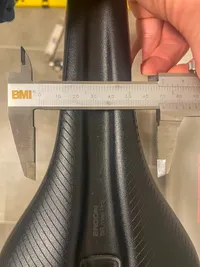
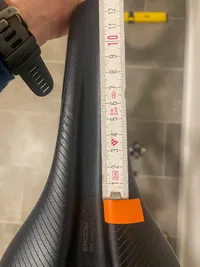
- Position on the saddle: Use the seven centimeter rule to determine where you naturally sit on the saddle. Measure from the saddle’s tip to the point where it is 7 cm wide.


- Saddle height: Measure from the seven centimeter point vertically down to the horizontal laser line to find the saddle height. Take a note of the crank length for context.
- Horizontal saddle position: Measure from the seven centimeter point horizontally to the vertical laser line to assess how far behind the bottom bracket your position is.
- Reach to the handlebars: Measure from the center of the handlebar top tube horizontally to the vertical laser line to determine the reach from the handlebars to the bottom bracket. If your bike has drop bars, take note of their reach (typically around 80 mm).
- Handlebar height: Measure from the center of the handlebar top tube vertically down to the horizontal laser line to get the handlebar height relative to the bottom bracket.
My measurements
| Fairlight Strael | Fairlight Secan | Santa Cruz Blur | |
|---|---|---|---|
| Saddle height | 720.0 mm | 721.0 mm | 717.0 mm |
| Crank length | 172.5 mm | 172.5 mm | 175.0 mm |
| Max height | 892.5 mm | 893.5 mm | 892.0 mm |
| Saddle position | 195.0 mm | 174.0 mm | 200.0 mm |
| Reach to the handlebars | 470.0 mm | 476.0 mm | 518.0 mm |
| Handlebar reach | 80.0 mm | 80.0 mm | -42.0 mm |
| Total reach | 745.0 mm | 730.0 mm | 676.0 mm |
| Handlebar height | 652.0 mm | 671.0 mm | 676.0 mm |
| Saddle drop | 68.0 mm | 50.0 mm | 41.0 mm |
Observations
I was surprised by the consistency in saddle heights across the three bikes. It’s worth noting that the Blur has the most saddle setback and longer 175 mm cranks, which requires more leg extension than the other bikes. Although the reach on the Blur appears shorter in numbers, the 750 mm wide handlebars cause me to lean forward more, bringing its reach closer to the drop bar bikes with their 400 mm handlebars.
I may consider lowering the saddle slightly on the Blur, but overall, I feel comfortable and don’t see the need for adjustments.
The Fairlights are a different case. I came to the point to prefer a lower front position on both, but the stems are already as low as possible. I’m currently transitioning from a 56 tall frame to a 56 standard frame for the Secan, and likely will do the same with the Strael.